


Evaporative cooling startup
How to prepare your cool cell system for the season 5 May 2022
 2 minute read
 By:
By: Taking the time now to clean and adjust your cool cell system will save time later and improve the system's performance during the season.
1) Remove the top pad retainers.
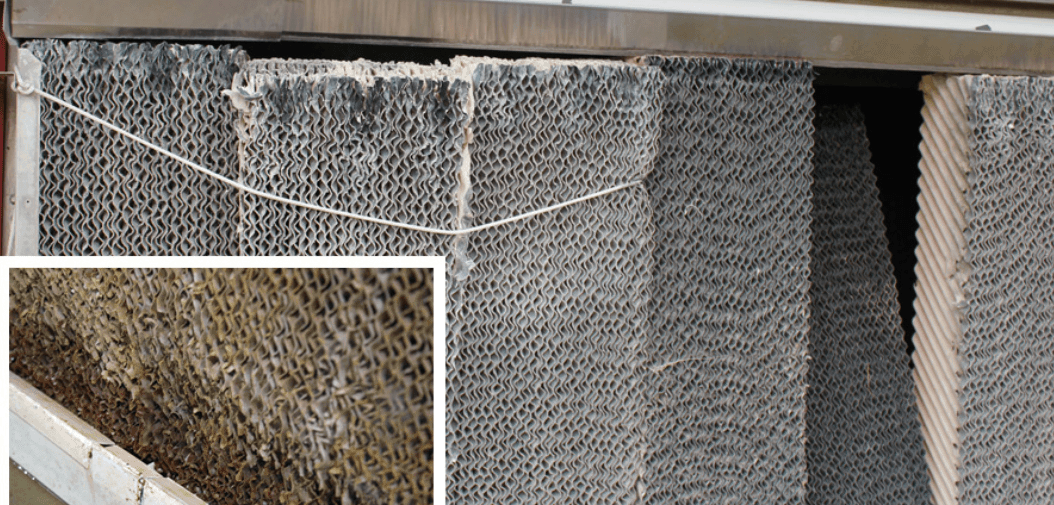
2) Remove the pads and prop them against the building. Using a low-pressure hose-end sprayer, flush away debris on both sides of the pads. Do not use a high-pressure sprayer that may damage the pads; instead, use a soft-bristle brush on any problem areas. Do not use bleach or other chlorine-based cleaners that destroy the pad material by dissolving the glue.
3) Check the pads for any rodent or mechanical damage. Look for soft areas on pad bottoms that can cause them to sag. Sagging pads reduce the amount of cooled air entering the buildings by allowing it to "short-circuit" through gaps instead of passing through the pads.
4) Next, spray the inside of the pad framing to remove cobwebs and dirt.
5) Remove several trough covers and flush any sand or dirt from the trough. Inspect the areas where the troughs join for gaps or missing caulk. Check for trough supports that might have come loose from the wall.
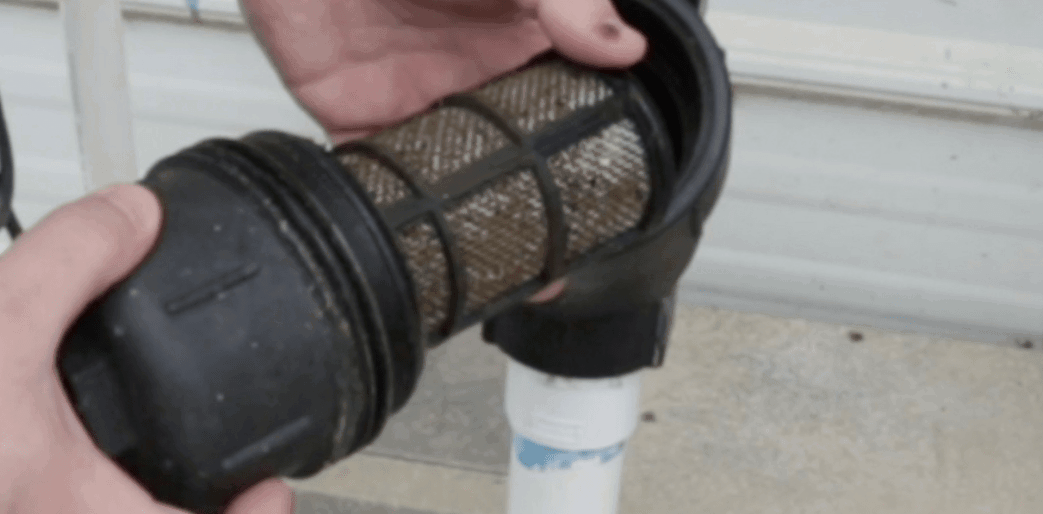
6) Remove the trash and sediment from the sump tank with a wet vac or trash pump instead of using the system's distribution pump, preventing deposits in the sump from being recirculated. Clean or replace any filters. Refill the system with fresh water.
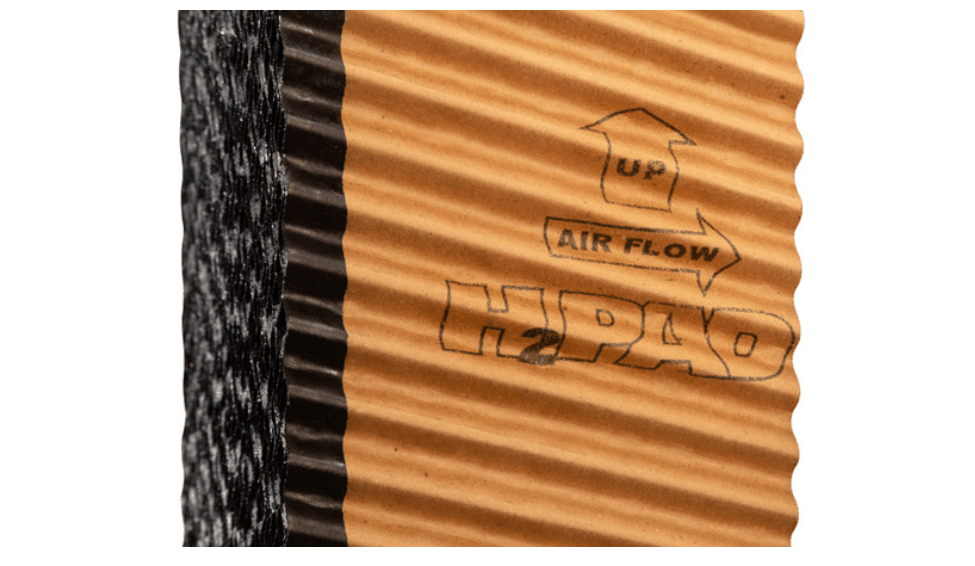
7) Return the pads to the system, checking pad orientation with the edge guard facing away from the building. For pads without an edge guard coating, locate the directional arrows on the side of the pad showing the up position and airflow direction. Insert the pad into the bottom trough first and press it into place. Slide the pad tightly against the adjoining pad to prevent any gaps. Reinstall the pad retainer.
8) Many common problems with cool cells result from poor water distribution. A balanced system ensures even water flows across the pad face to flush away dirt and contaminants and prevent dry areas.
Begin by opening the ball valve on the distribution pipe opposite the pump and then turning on the pump, allowing water to flush out the end and remove debris. Turning the pump on before opening the valve may cause sediment in the pipe to plug the holes.
Next, shut the valve and walk the system looking for uneven wetting or dry streaks; starting at the pump end, unplug any holes in the distribution pipe end. Once you reach the end, open the valve for a few seconds to flush anything in the pipe from cleaning the holes.
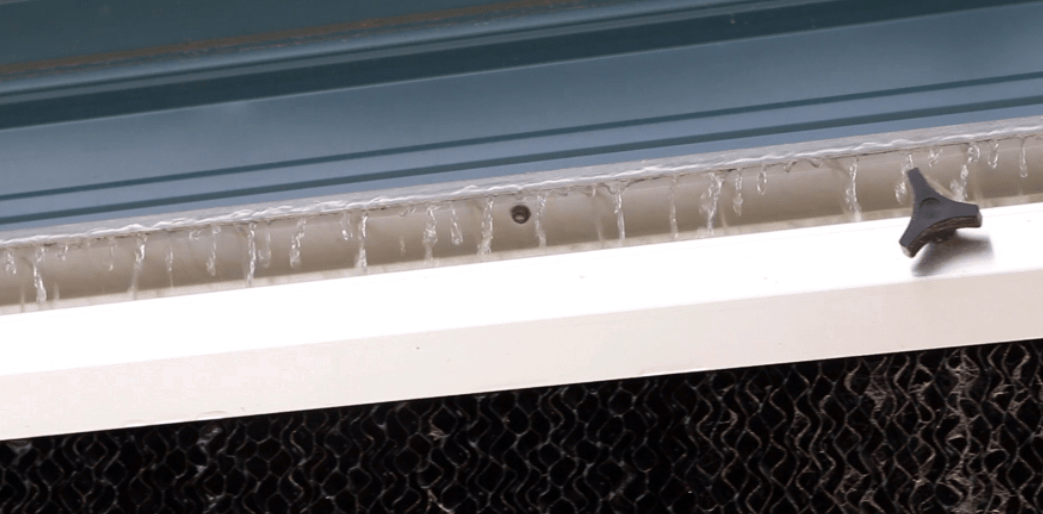
Check the pressure of the water exiting the holes. The water jets should hit the top plate with enough force to break them up to flow evenly down the pads. When the system is operating correctly, there will be even water flow across the pads, with most water running out the bottom.
Adjust the ball valve on the feeder line until the flow is even. This adjustment is especially critical if the same pump feeds two pad systems.
9) Turn the pump off, allowing all the water in the system to return to the trough and sump. Adjust the float until the water level is an inch below the pad bottoms to avoid the pads sitting in water and deteriorating. Check for any leaks in the trough bottom.
Spring startup is the time to address issues that occurred last year. If you had problems with algae or scale buildup in the past, add the correct chemical treatments now and stay ahead of the problem.